

Winchester/Miroku '86 Mods/Rebounding Hammer Fix
Since my Winchester/Miroku 1886 Extra Light arrived, I have have been busy with a few modifications. The Winchester/Miroku '86 Extra Light is a strong fine quality firearm ,but it had all the modern laywer induced safty crap on it such as firearms do these days. First the Winchester/Miroku '86 had the rebounding hammer, which resulted in a terrible trigger pull, and in my case, misfires due to light primer strikes. First thing I knew was, the rebounding hammer feature had to go. From the help of an article by SAAJim on Winchester/Miroku 1892 Hammer And Trigger Modifications I found that this info and easy fix can be applied to the Miroku 86 as well.
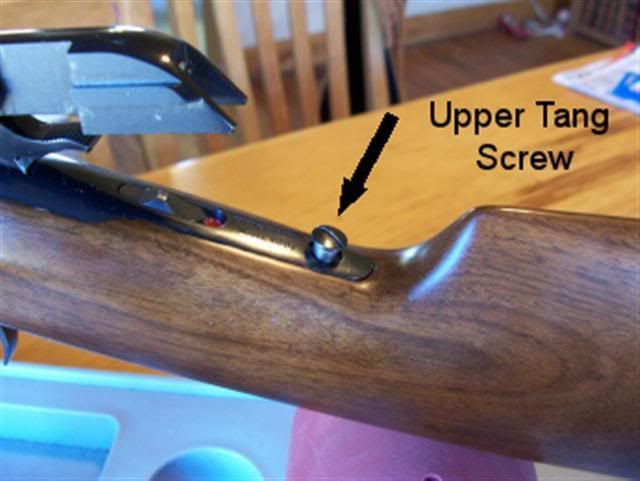
- STEP ONE:Remove the upper and lower tang screws and pull buttstock off. The upper tang screw goes all the way through and screws in the bottom tang. The lower tang screw is a wood screw.

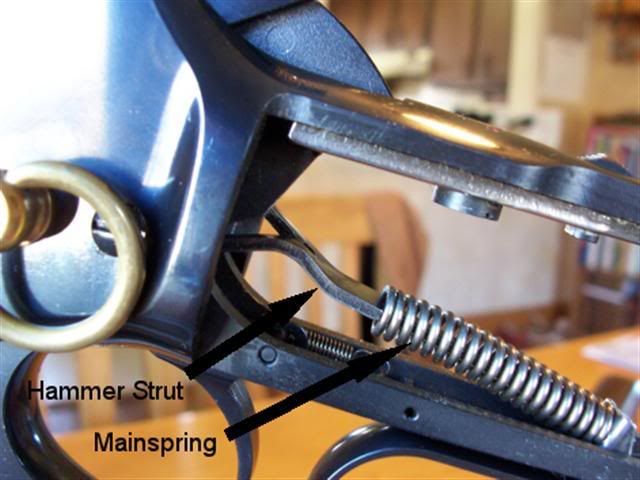
With the buttstock removed you can see the Hammer Strut and mainspring. The culprit is the lower leg of the Hammer Strut pushing against the the hammer causing it to rebound or bounce back.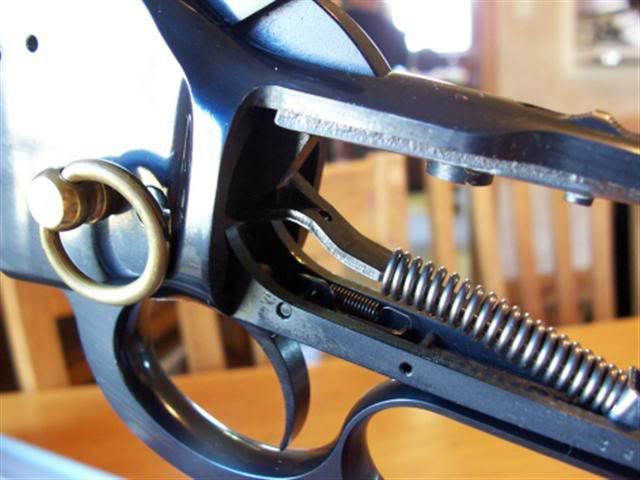
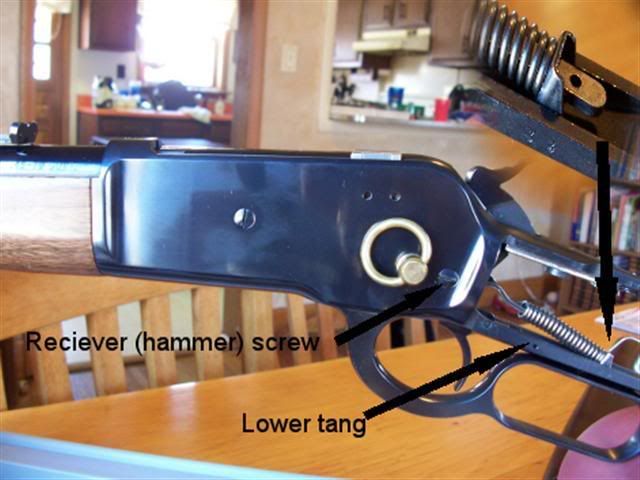
- STEP TWO:With the action closed pull hammer to rear and remove the receiver (hammer) screw. You may want to captivate the mainspring before removing the receiver (hammer) screw. This coil mainspring is strong and may fly to the next room if not held in place. You can use a paper clip or similar item to hold the mainspring in place.
- STEP THREE:After removing the receiver (hammer) screw, open the lever and pull the lower tang straight back out of the receiver. At this time the hammer will drop out as well. Pictured below is the hammer and lower tang assembly.
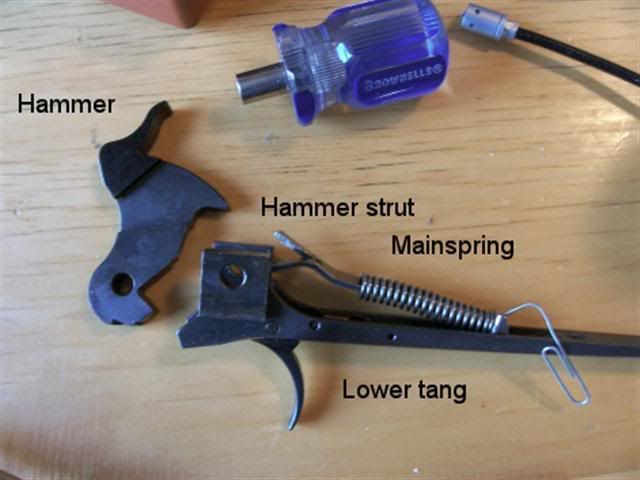
Take the mainspring off the hammer strut.(Be careful, as this spring is strong and under tension)
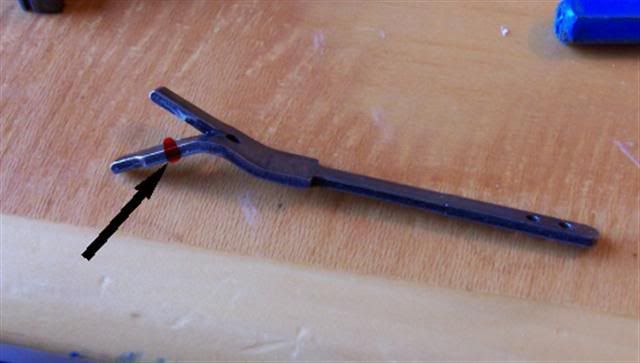
- STEP FOUR: MODIFYING THE HAMMER STRUT:You want to cut off part of the lower leg of the hammer strut so it doesn’t touch the hammer when the hammer is all the way down. I cut it off to approximately here and rounded off and polished the lower leg to remove any sharp edges where I cut it. The top leg of the hammer strut was already polished from the factory so I left it be. At this point the rebounding feature is GONE!
As far as the mainspring goes I chose to cut a few coils off to lighten it some. If you do this it is best to go slow and have a replacement spring handy just in case. I cut three coils off the mainspring but did so in two different tear downs and it works great with no light primer strikes. Again if you elect to do this it is best to go slow.
- STEP FIVE: REASSEMBLY: An easy way to captivate the mainspring for reasembly is to install the hammer in lower tang out side the receiver then insert the reciever (hammer) screw into lower tang, then allow the hammer to fall as far forward as possible and insert the spring and guide into the lower tang.Pull the hammer back compressing the spring. Once the mainspring is captivated pull out the Reciever screw out of lower tang.( thanks for the tip Griff!) Also I found it easier to look at the end or back of the receiver when putting the hammer and lower tang back in to help line up with the carrier. I used a punch to help line up the hammer, carrier, and inserted the receiver (hammer) screw. This modification helped in smoothing the action, and lightening the trigger pull.

- Heres the finished product after removing the rebounding hammer feature.


posted by Steve B | 5:00 PM
![]()
![]()
1 Comments:
with this modification removing the rebounding hammer feature do you still have a 1/2 cock on the hammer?
Post a Comment
<< Home