Reload'n And Levergun'n

My love of handloading my own cartridges, casting my own bullets, and shooting fine pistols and leverguns. Range reports, Ballistics, Reviews, Pictures, and everything related.

My Photo
Name:
Location: Jennings Co, Southern Indiana, United States

Friday, March 09, 2007

Winchester/Miroku '86 Mods/Custom Work/Stock Refinish

With the rebounding hammer feature gone and with the new Browning hammer installed and sear modification, I now have a true half cock safety on this rifle. But now what to do with that ugly, unhistoricaly correct tang safety?


Fellow friend and leverguns forum member MikeD has been on a similar modification journey with his Winchester/Miroku '86 Extra Light and had the tang safety slot filled in, and tang and barrel remarked by Hunter Restorations. I really liked the way Mike's turned out. This is how Winchester/Miroku should have done the '86 and '92's to begin with. Click photos to enlarge.

(Photos of barrel and tang remarkings courtesy of MikeD)


I liked the look of Mikes '86 Extra Light so well that I also ended up sending my '86 Extra Light to Colt1849 of Hunter Restorations. I'm having the tang safety filled in and the tang and barrel remarked, and re blued. Colt1849 does outstanding work and I'm looking forward to having the work done.

The following before and after photos is of an original Winchester '86 chambered in .40-82. This beautiful restored rifle was made in 1889 and belongs to fellow friend and leverguns member Kirk. Here is a taste of Colt1849's work.


(Before and after photos courtesy of Kirk)


In the meantime while my '86 is away I have refinished the stock and forend. During the process of removing the rebounding hammer feature I chipped the stock when putting it back on the receiver. It was time to fix the chip and I also wanted the stock and forend to have more of an older Winchester color and look. I used Herters French Red stock filler and stain, and, as always, I added a hand rubbed Tru Oil finish.


This rifle is starting to come together. :-)

Thursday, March 08, 2007

Winchester/Miroku '86 Mods/ Hammer Swap And Sear

After removing the rebounding hammer feature, I still did not have a true half cock per say. The Winchester/Miroku hammer has a ledge or shelf, but not a full half cock notch cut in the hammer.

(Winchester/Miroku hammer without half cock notch)


With the Winchester/Miroku hammer, the trigger could still be pulled with some effort in the half cock position. Now it takes a good amount of pressure to pull the trigger, but nevertheless it will slip off the ledge when enough pressure is applied. I ended up ordering a Browning '86 hammer to replace the Winchester/Miroku hammer. The Browning hammer has the half cock safety notch and doesn't have the ugly cut out on the side of the hammer to accommodate Miroku's tang safety, and it just looks better IMO.


(Browning hammer/Winchester hammer)


(Browning hammer showing the half cock notch)


The Winchester/Miroku sear was to thick to fit the new Browning hammer and was not fully slipping into the half cock notch. This allowed the trigger to still be pulled in the half cock position. A little file time later on the Winchester sear, and I now have a true half cock safety. The sear now slips in and stays in like it should.

(Before and after the hammer swap and sear modification)

Tuesday, March 06, 2007

Winchester/Miroku '86 Mods/Rebounding Hammer Fix


Since my Winchester/Miroku 1886 Extra Light arrived, I have have been busy with a few modifications. The Winchester/Miroku '86 Extra Light is a strong fine quality firearm ,but it had all the modern laywer induced safty crap on it such as firearms do these days. First the Winchester/Miroku '86 had the rebounding hammer, which resulted in a terrible trigger pull, and in my case, misfires due to light primer strikes. First thing I knew was, the rebounding hammer feature had to go. From the help of an article by SAAJim on Winchester/Miroku 1892 Hammer And Trigger Modifications I found that this info and easy fix can be applied to the Miroku 86 as well.

  • STEP ONE:Remove the upper and lower tang screws and pull buttstock off. The upper tang screw goes all the way through and screws in the bottom tang. The lower tang screw is a wood screw.


  • With the buttstock removed you can see the Hammer Strut and mainspring. The culprit is the lower leg of the Hammer Strut pushing against the the hammer causing it to rebound or bounce back.


  • STEP TWO:With the action closed pull hammer to rear and remove the receiver (hammer) screw. You may want to captivate the mainspring before removing the receiver (hammer) screw. This coil mainspring is strong and may fly to the next room if not held in place. You can use a paper clip or similar item to hold the mainspring in place.
  • STEP THREE:After removing the receiver (hammer) screw, open the lever and pull the lower tang straight back out of the receiver. At this time the hammer will drop out as well. Pictured below is the hammer and lower tang assembly.

Take the mainspring off the hammer strut.(Be careful, as this spring is strong and under tension)

  • STEP FOUR: MODIFYING THE HAMMER STRUT:You want to cut off part of the lower leg of the hammer strut so it doesn’t touch the hammer when the hammer is all the way down. I cut it off to approximately here and rounded off and polished the lower leg to remove any sharp edges where I cut it. The top leg of the hammer strut was already polished from the factory so I left it be. At this point the rebounding feature is GONE!

As far as the mainspring goes I chose to cut a few coils off to lighten it some. If you do this it is best to go slow and have a replacement spring handy just in case. I cut three coils off the mainspring but did so in two different tear downs and it works great with no light primer strikes. Again if you elect to do this it is best to go slow.

  • STEP FIVE: REASSEMBLY: An easy way to captivate the mainspring for reasembly is to install the hammer in lower tang out side the receiver then insert the reciever (hammer) screw into lower tang, then allow the hammer to fall as far forward as possible and insert the spring and guide into the lower tang.Pull the hammer back compressing the spring. Once the mainspring is captivated pull out the Reciever screw out of lower tang.( thanks for the tip Griff!) Also I found it easier to look at the end or back of the receiver when putting the hammer and lower tang back in to help line up with the carrier. I used a punch to help line up the hammer, carrier, and inserted the receiver (hammer) screw. This modification helped in smoothing the action, and lightening the trigger pull.


  • Heres the finished product after removing the rebounding hammer feature.


Fieldstripping The Winchester/Miroku 1886


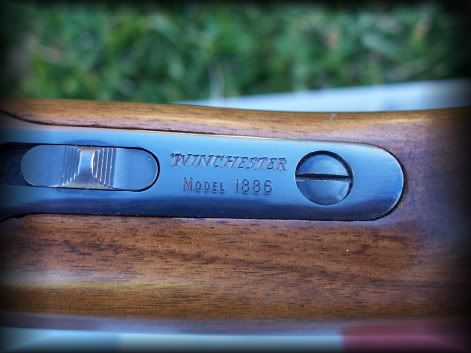
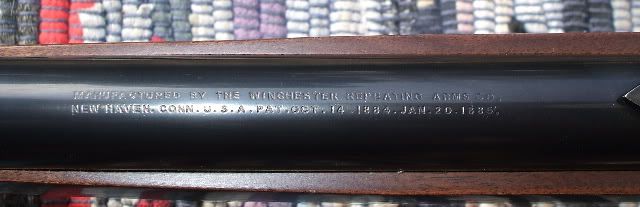
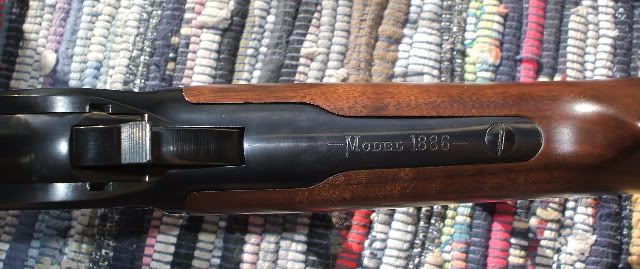
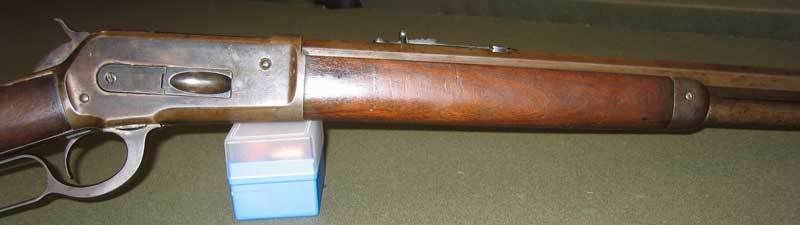
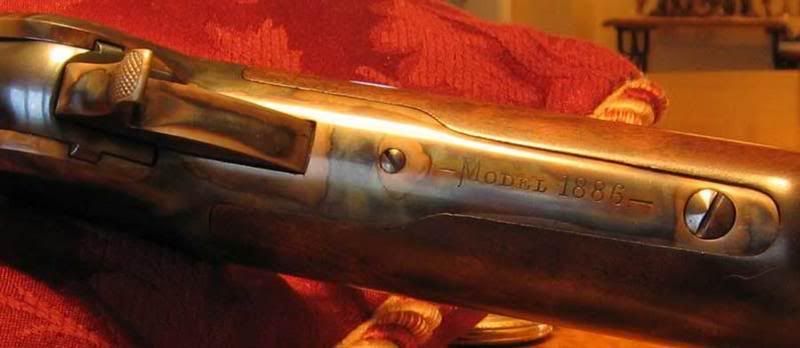
The following is not new information, but I have found little info with pictures as far as fieldstripping the Winchester/Miroku 1886. I thought it might be helpful to those who own these fine leveractions to have such....Click on images to enlarge.

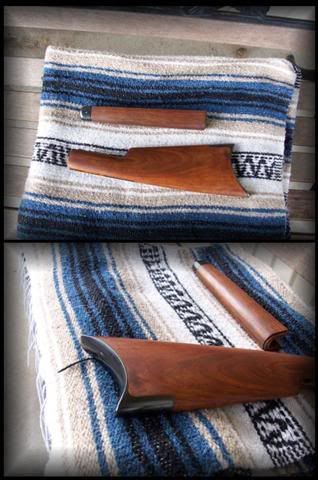
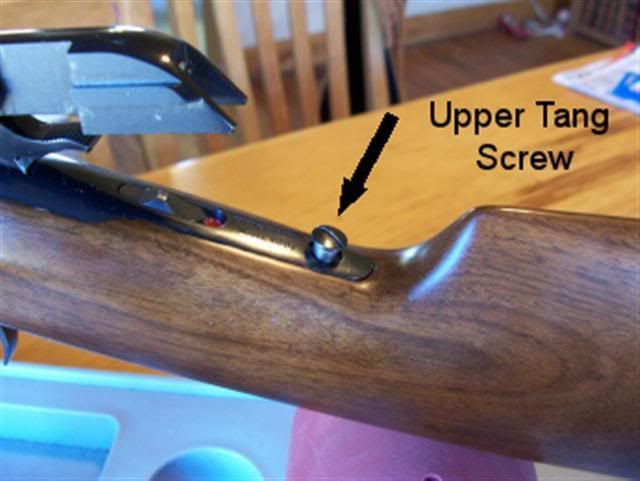
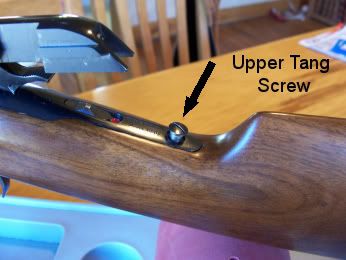
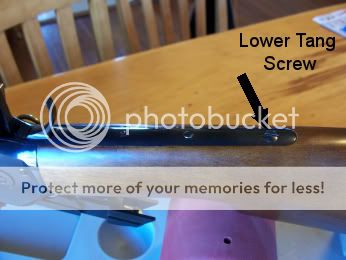
STEP ONE: Remove the upper and lower tang screws and pull buttstock straight off the rear of the receiver. The upper tang screw goes all the way through and screws in the bottom tang. The lower tang screw is a wood screw.


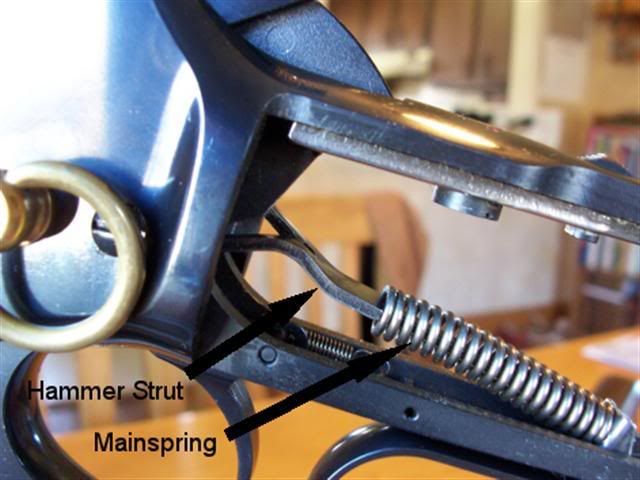
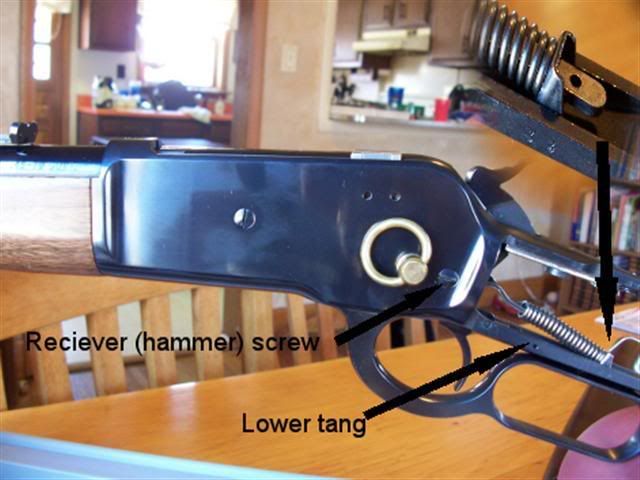
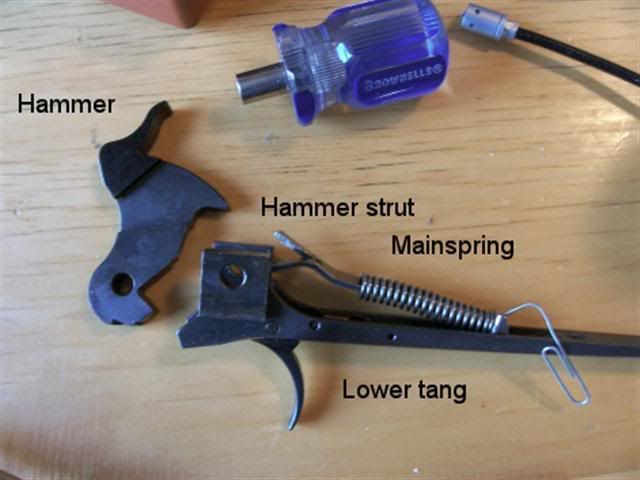
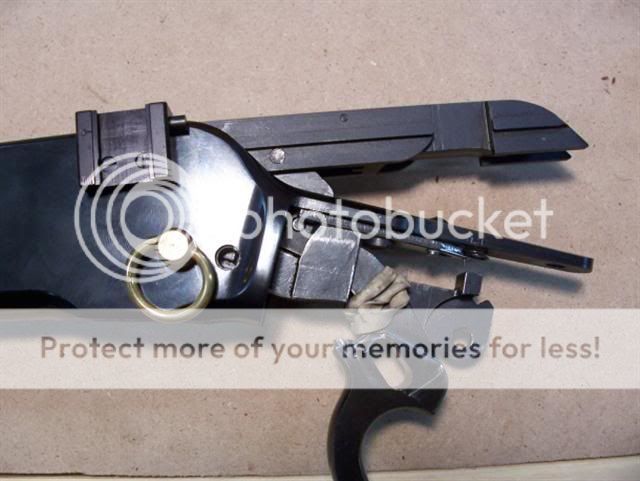
STEP TWO:With the action closed pull the hammer to rear and remove the receiver (hammer) screw. You want to captivate the mainspring before removing the receiver (hammer) screw. This coil mainspring is strong and may fly to the next room if not held in place. You can use a paper clip or similar item to hold the mainspring in place.

STEP THREE: After removing the receiver (hammer) screw, open the lever and pull the lower tang straight back out of the receiver. At this time the hammer will drop out as well.

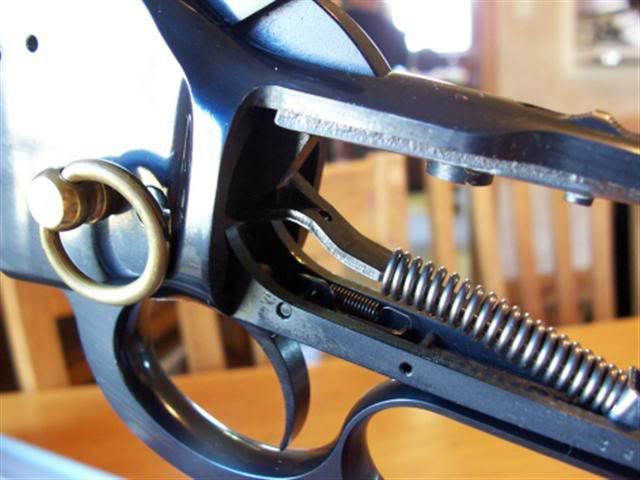
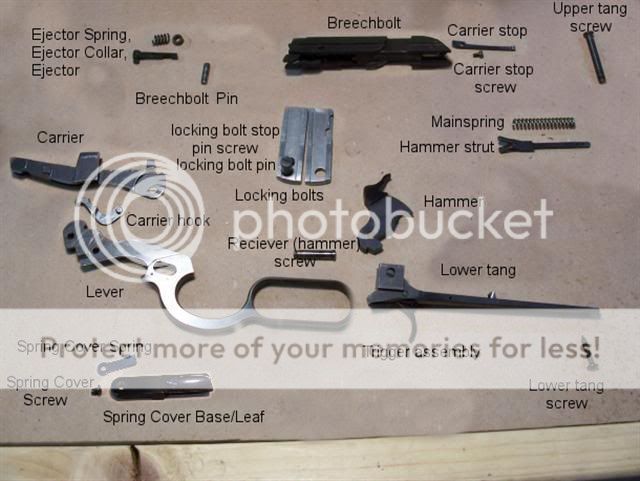
Pictured below is the hammer and lower tang assembly. The trigger assembly was not taken apart but it consists of the Trigger, Sear, Trigger Spring and the Pivot (Trigger) Pin.

Action Disassembly

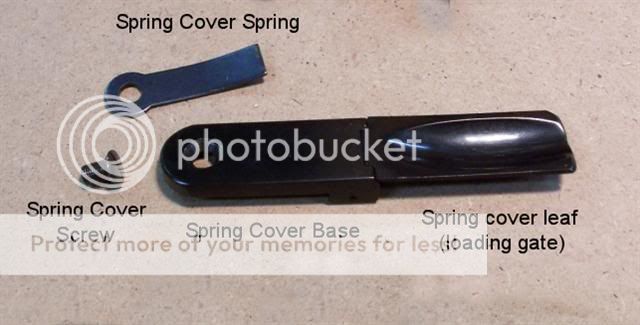
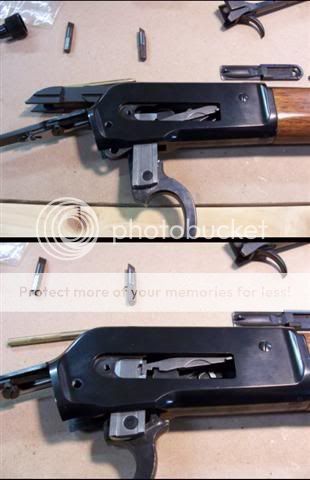
STEP ONE: Remove the Spring Cover Screw from the right hand side of the receiver.


(SPRING COVER ASSEMBLY)


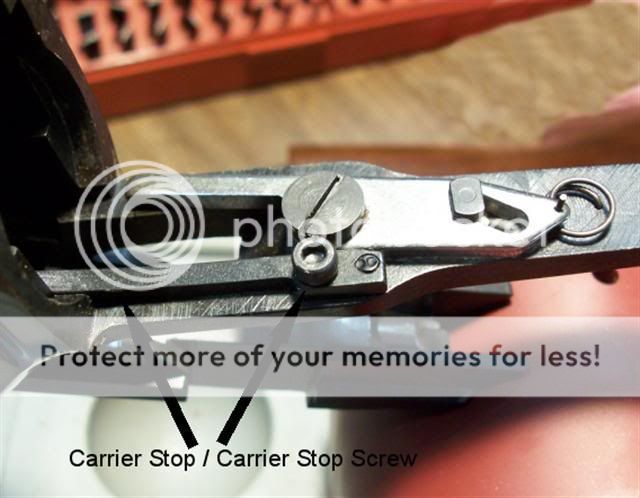
STEP TWO: Unscrew the carrier stop screw and remove the carrier stop from underneath the upper tang.


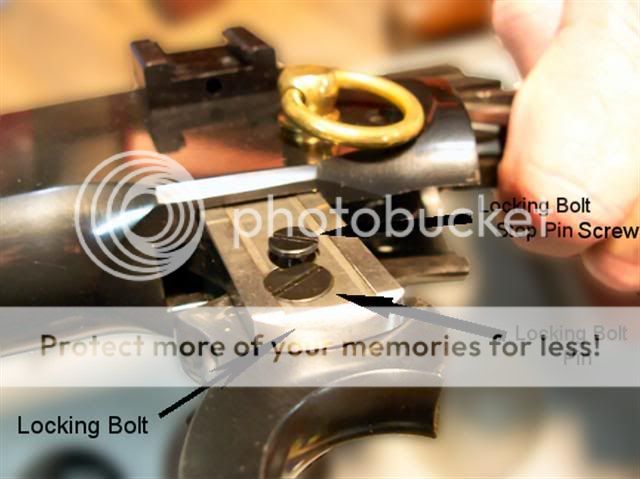
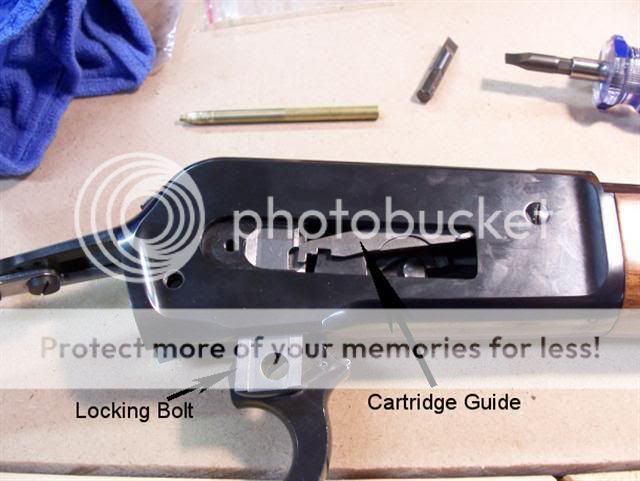
STEP THREE: With the action part way open, unscrew the locking bolt stop pin screw from the left locking bolt. This will allow the locking bolt pin to be pushed out of the lever and locking bolts from right to left. Now pull out both locking bolts from bottom of receiver.


If you have trouble pulling the right locking bolt out of the bottom of the receiver, move the cartridge guide up or down, whichever is necessary, to allow the locking bolt to be pulled out.


STEP FOUR: Lower the finger lever and slide the Breech Bolt out of the receiver far enough to see the lever and Breech Bolt Pin. Use a punch to drift out the Breech Bolt Pin out of the Breechbolt.


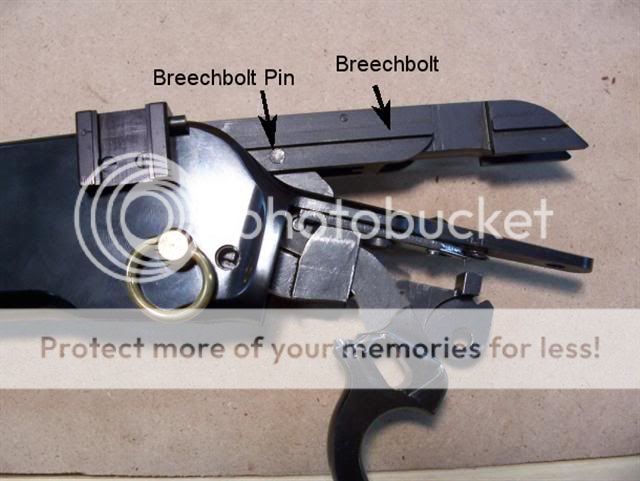
After removing the Breech Bolt Pin, pull lever out of the bottom of the Breechbolt and slide the Breechbolt out of the receiver.

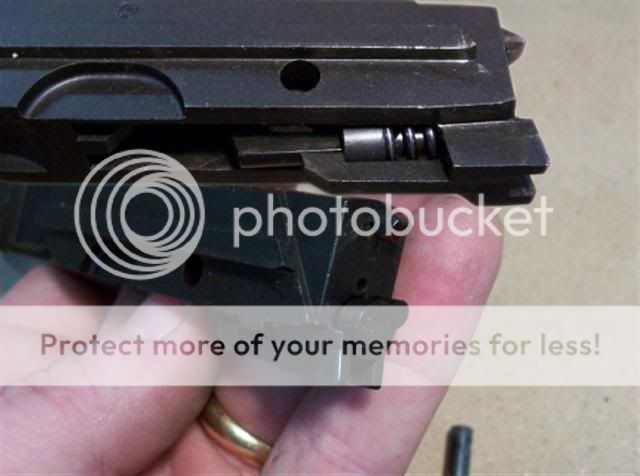
Be careful when pulling out the Breechbolt as the Ejector, Ejector Spring, and Ejector Collar is now loose and can fall out the front of the Breechbolt. Once the Breechbolt is out of the receiver remove the Ejector, Ejector spring, and Ejector Collar out the front of the Breechbolt.


(BREECHBOLT ASSEMBLY)


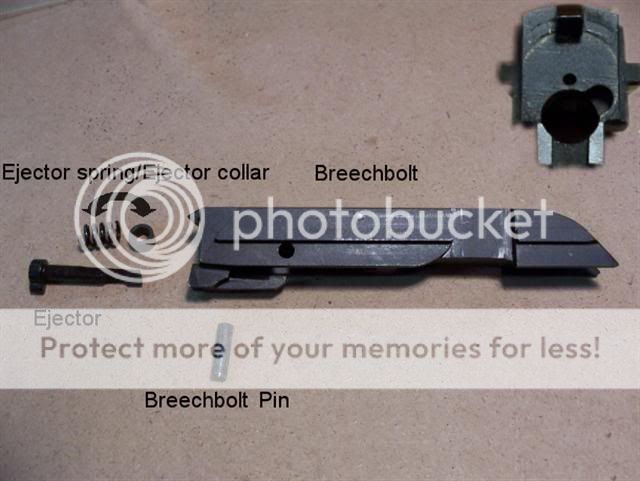
The firing pin is of the inertia type and can be removed by using a punch to drift out the Extractor pin. Once the Extractor pin and Extractor are removed the inertia firing pin can be pulled out of the rear of the breechbolt.


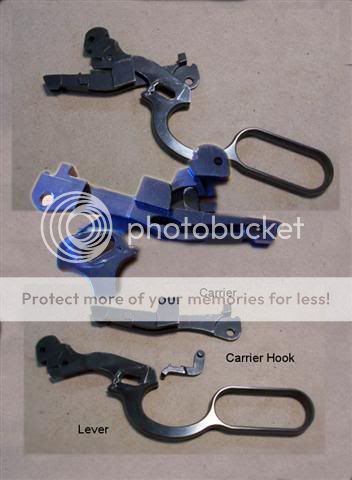
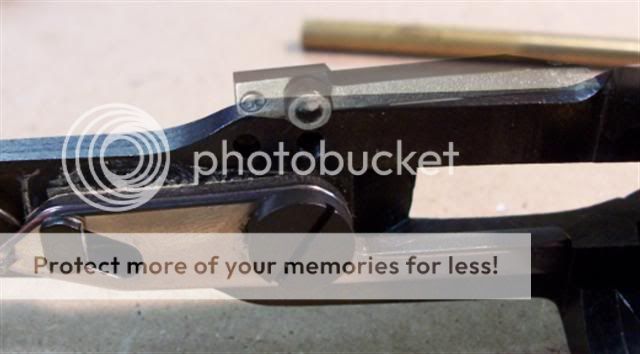
STEP FIVE: Slide the Lever, Carrier Hook and Carrier out the back of the receiver. Notice how these parts go together for reassembly. The Carrier Hook connects the Lever And Carrier by the lower hole in the lever and (rides in the middle of the Carrier) a channel cut out of the Carrier.


I didn’t take the rifle down any further, but if need be you can remove the Cartridge Guide and Cartridge Stop from the receiver.

To remove the cartridge guide simply unscrew the cartridge guide screw from the right side of the receiver and remove the Cartridge Guide from inside the right hand side of the Receiver.


To remove the Cartridge Stop, unscrew the Cartridge Stop Screw from the left side of the receiver.


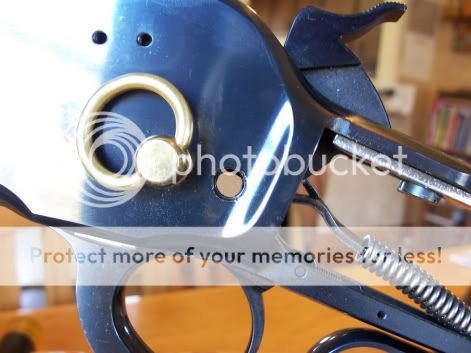
The Cartridge Stop is highlighted in the picture below.


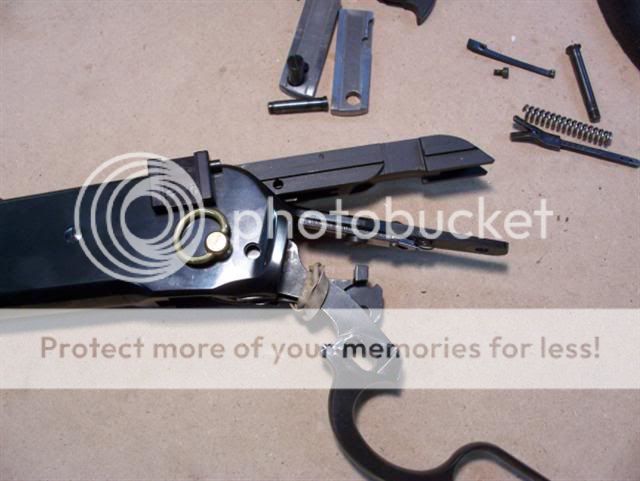
Now to get all these parts back in the ’86!
(Click to enlarge)

REASSEMBLY

Reassemble in the reverse order.

To get the Lever, Carrier Hook, and Carrier to stay together for reassembly it is much easier to use a rubber band to hold these parts together. If not, you can become frustrated in short order.

STEP ONE: Slide the Breechbolt assembly partway into the receiver. Slide the Carrier, Carrier Hook, and Lever into the rear of the receiver.


Lineup the Lever and Breechbolt and insert the Breechbolt Pin into the Breech Bolt. You will need to make sure the firing pin, and Ejector is both pushed in far enough into the bolt, and that the lever is lined up at the same time so the Breechbolt Pin can be pushed into the Breechbolt. Fun isn’t it? This is just about the time you wish you had a third hand, but in no time you will have these lined up and the Breechbolt Pin inserted.

(Lever and Breechbolt pin hole lined up and Breechbolt Pin inserted)


Slide the Breechbolt, Lever, and Carrier on in the receiver. Once you get these parts into the receiver far enough discard the rubber band. Now on to the Locking Bolts.

STEP TWO: Insert the Locking Bolts in from the bottom of the receiver and install the Locking Bolt Stop Pin and screw. Again if you have problems inserting the right Locking Bolt, move the Cartridge Guide up or down whichever is necessary to allow the right Locking Bolt to go up into the receiver. The right Locking Bolt has a channel or groove cut into it to move the Cartridge Guide up and down while the action is cycled.


STEP THREE: Install the Spring Cover Assembly.

STEP FOUR: Install the Carrier Stop and Carrier Stop Screw to the underside of the Upper Tang


STEP FIVE: Install the Hammer and Lower Tang Assembly back in the rear of the receiver. Again this is somewhat of a juggling act and a third hand could come in handy at this point. You need to keep the Lower Tang pressed in while making sure the Trigger is pulled back while aligning the holes in the Hammer and Carrier. Use a punch to help align the parts.


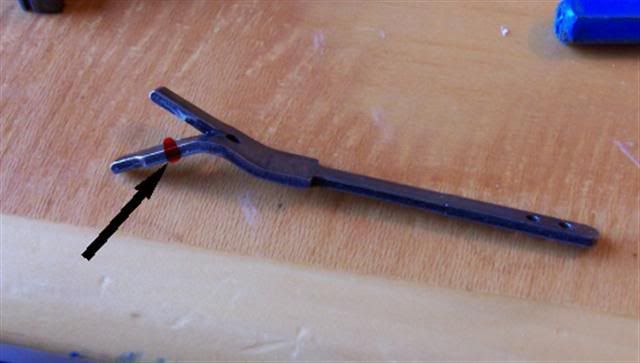
When you get the Receiver Screw pushed halfway in take a punch and align the carrier so the Receiver Screw can be pushed on in and screwed in the Receiver. If you removed the Mainspring during this process it needs to be captivated. An easy way to captivate the Mainspring for reassembly is to install the hammer in the Lower Tang outside the Receiver, then insert the Receiver (Hammer) Screw into the Lower Tang, then allow the Hammer to fall as far forward as possible and insert the Mainspring and Hammer Strut in the Lower Tang. Pull the Hammer back compressing the Mainspring. Once the Mainspring is captivated, pull the Receiver (Hammer) Screw out of the Lower Tang. (Thanks for the tip Griff!)


STEP SIX: Install the Buttstock.